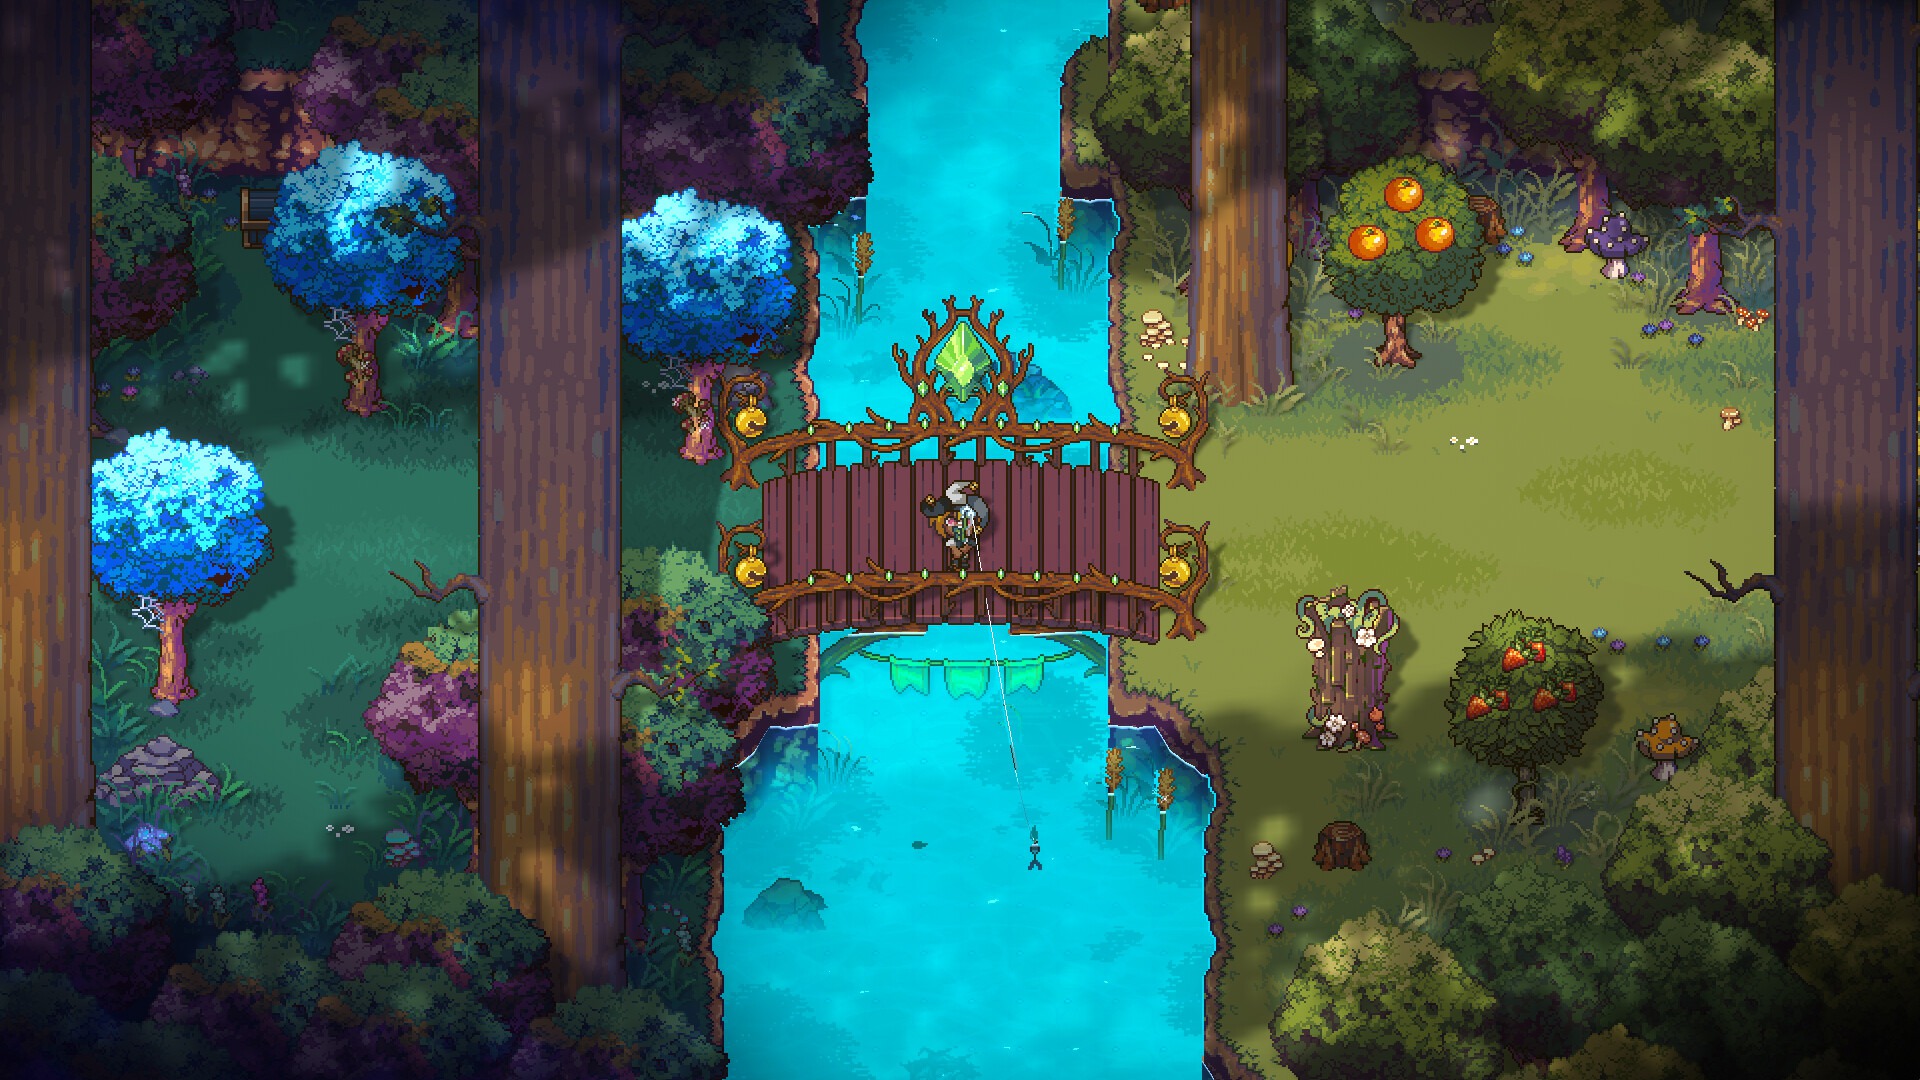
Sun Haven’s museum quietly rewards players who collect and donate items across three halls, and it is one of the best long-term goals for a new farmer to chase after the first season. Every donated piece fills a bundle, and completing bundles pays out useful gear and income bonuses. This guide breaks down the three halls, the full bundle checklist, and where to dig for the rarest fossils, gems, and ancient relics, so the museum becomes a steady source of reward instead of a mystery. It also pairs the collection loop with mining, fishing, and monster-hunting so progress happens naturally.
How the Museum Works
The Sun Haven museum sits in the heart of town and works like a self-paced collection quest. Players interact with the plaques in front of each display stand, donate matching items from their backpack, and fill every slot in a bundle to collect the reward. Nothing is permanently consumed in a harmful way; donating only improves their museum progress and unlocks payout.
- Donation currency: most donated items also grant museum tickets or gold once the bundle completes.
- Three separate halls hold every bundle: gems, culture, and aquatic displays.
- Weighted prizes: early bundles reward small tools and gold, while the largest collections unlock premium bonuses.
- Pairs with other goals: many museum items come straight from mining, fishing, and digging, so progress happens naturally during normal play.
Players who already follow a monster-dropping route or a crop-profit cycle will find the museum fills itself while they play.
The museum rewards are front-loaded. Early bundles pay out useful tools and gold that genuinely help the first season, while the deepest collections unlock premium prizes aimed at late-game players. Because the rewards compound as more bundles complete, the museum is one of the few systems where investing collection time early pays back across the entire run. A simple habit — keeping one of every new item instead of selling every duplicate — removes almost all the effort later on.
The Three Donation Halls
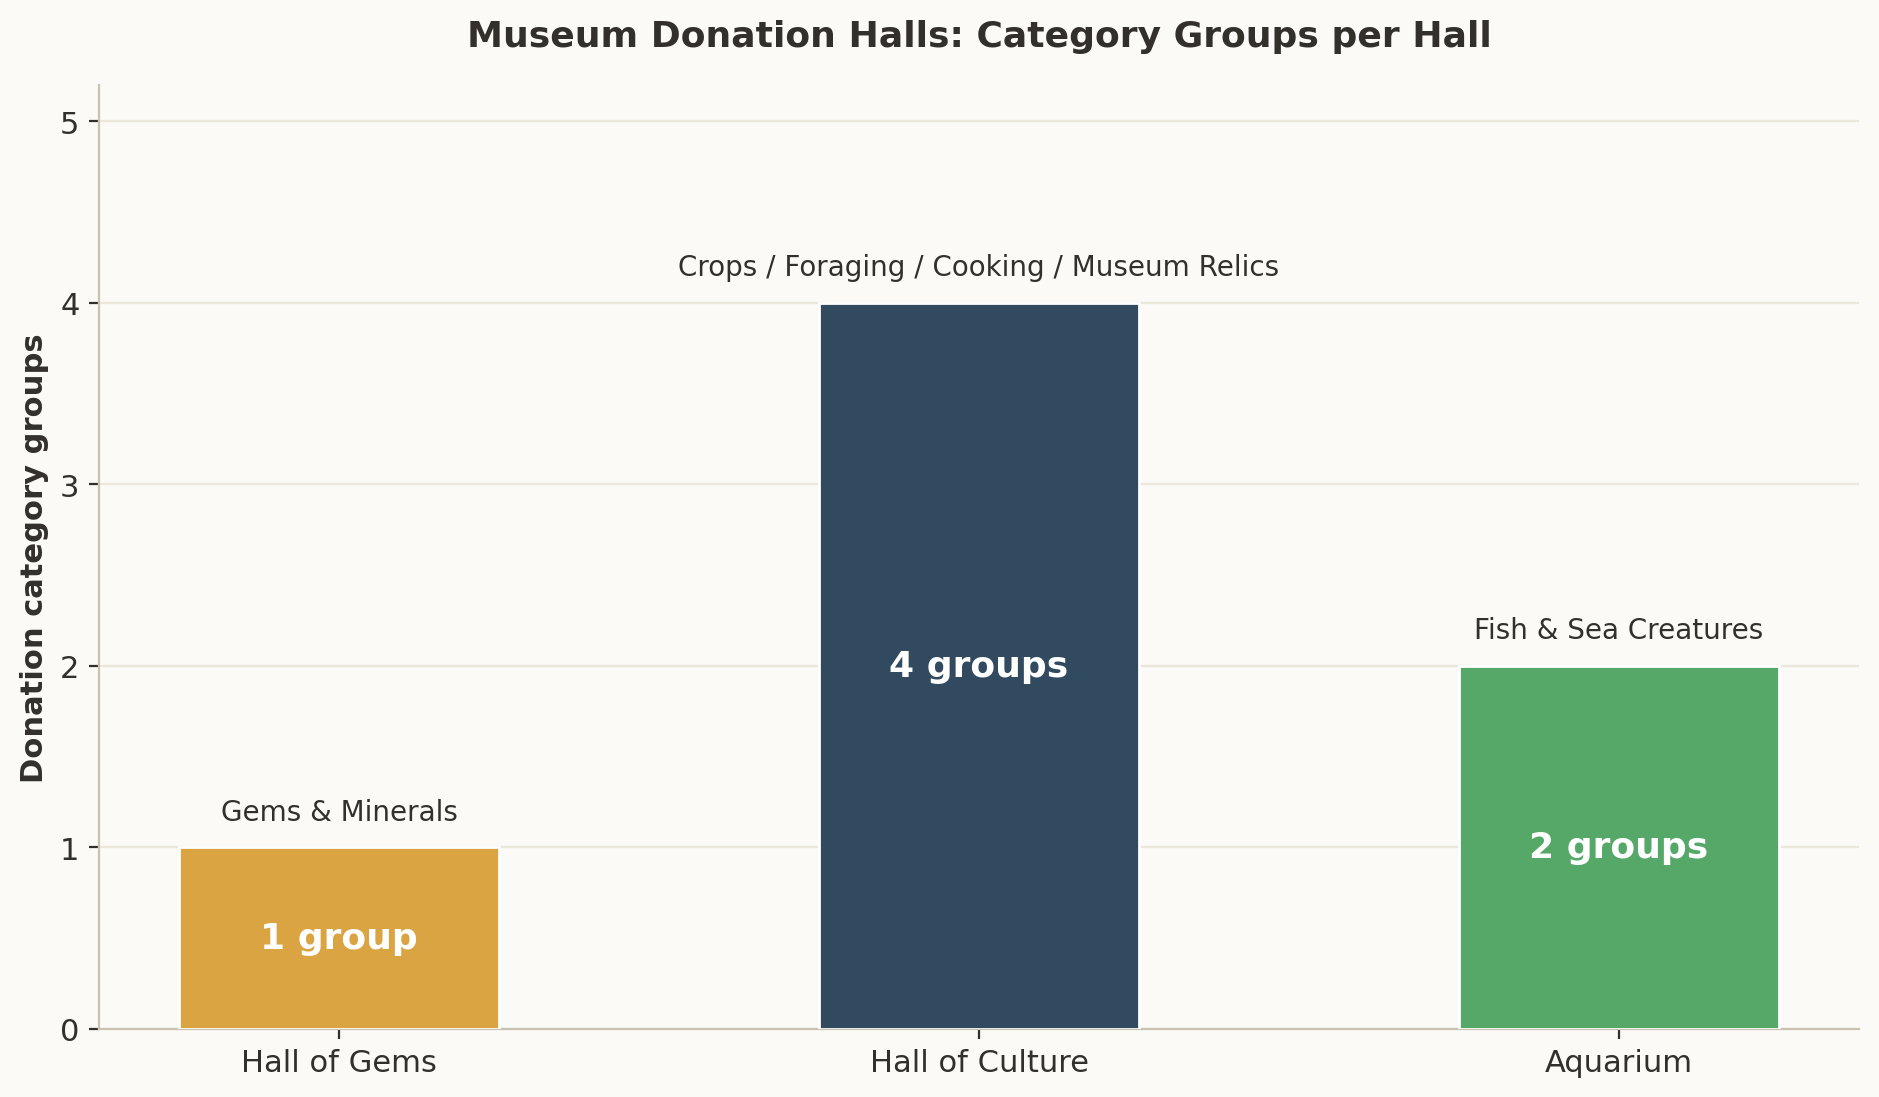
The museum is split into three halls, and each one uses a different kind of item to fill its bundles:
| Hall | Category groups | Example donations |
|---|---|---|
| Hall of Gems | Gems & minerals | Sapphire, Ruby, Amethyst, Diamond, Havenite, Black Diamond |
| Hall of Culture | Crops, foraging, cooking, museum relics | Seasonal crops, gathered plants, crafted dishes, ancient swords |
| Aquarium | Fish & sea creatures | Freshwater and ocean catches |
Each hall holds several bundle sets rather than one long list, so players can finish a small bundle early and bank the reward before tackling the larger sets. That structure makes the museum friendly to year-round farming players who are already rotating many different crops.
The diversity of the three halls is the key design detail. A player can never finish all the bundles with a single activity: gems demand mining, culture demands farming and digging, and the aquarium demands fishing. Players who spread their daily time across these hobbies complete the museum several times faster than a specialist, because each activity feeds a different hall in parallel rather than competing for the same items.
Museum Bundle Checklist
Working through the halls in order avoids wasted effort. The gem bundles demand mineral-only drops, the culture halls demand crops and relics, and the aquarium only wants fish. A practical trail is:
- Gem bundle: collect Sapphire, Ruby, Amethyst, Diamond, Havenite, and rarer mining drops like Dizzy stones and Black Diamond while diving into the mines.
- Crop bundles: donate one of each season’s crops; players already growing a best-crop rotation keep a spare of every profitable plant.
- Museum relics: ancient swords and trinkets such as the Chimchuck Trinket and the ancient Sun Haven, Nel’Varian, and Withergate swords usually come from digging and rare drops.
- Aquarium: keep one of every species caught across fishing spots to complete the water bundles.
Because several relics overlap with rare monster drops, players who grind those spots collect museum pieces at the same time.
Keeping a running checklist helps far more than it sounds. Because the museum has no in-world list of what is still missing once a slot is filled, players who want to track completions benefit from a simple written note of each bundle’s remaining slots. This avoids donating duplicates and makes it obvious which activity to prioritize next. For most players the checklist is simply: one of every gem, one of every crop, one of every fish, and one of every relic — then watch the bundles close themselves.
Digging Spots and Loot
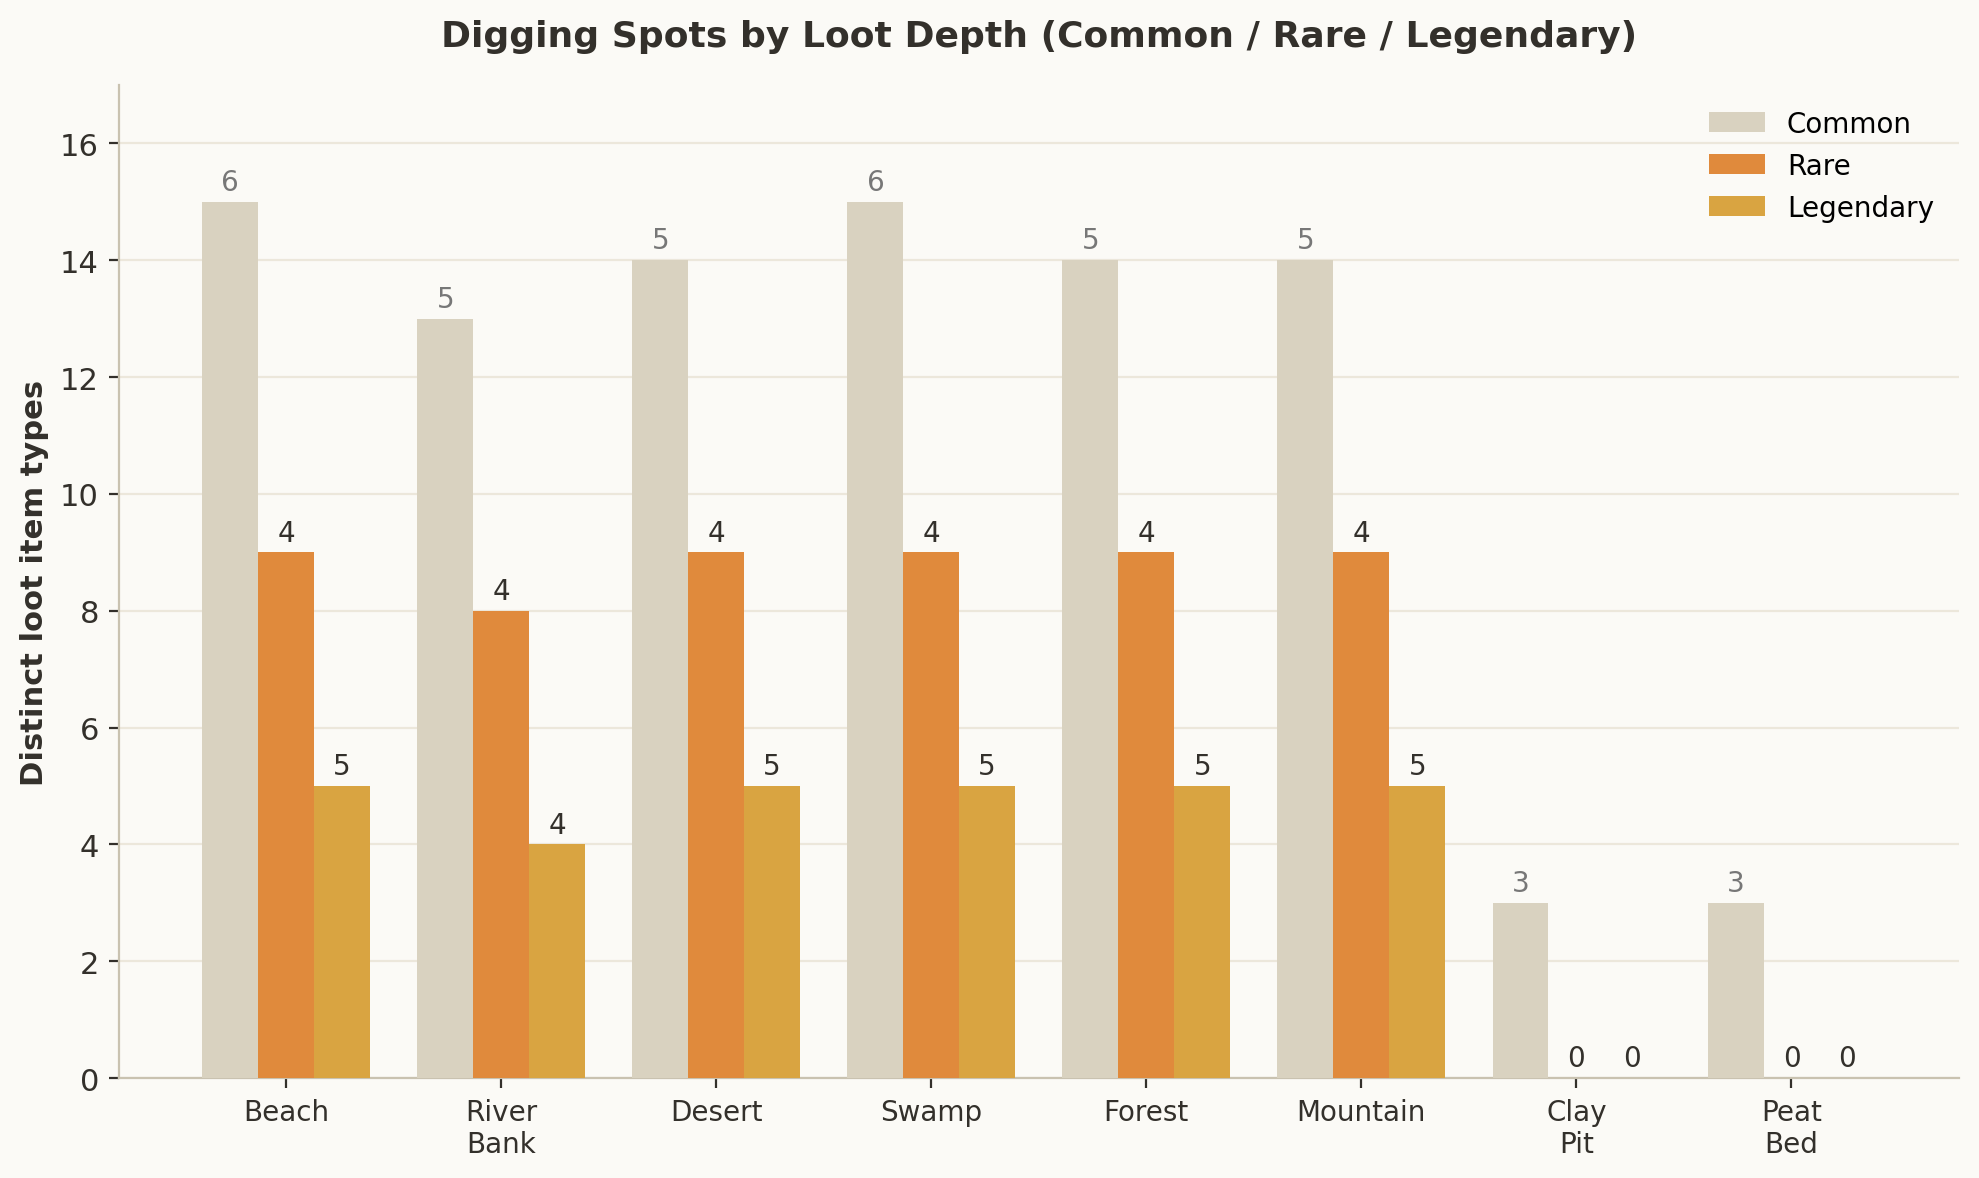
Digging is the fastest way to build the museum’s relic piles. There are eight digging spots, and each one favors a different blend of the three loot bands: common building materials, rare minerals and fossils, and legendary ancient treasure.
| Spot | Notable rares | Legendary targets |
|---|---|---|
| Beach | Driftwood, Sea Glass, Coral, Gypsum | Amber, Pearl, Fossil Shell, Black Pearl, Ancient Coin |
| River Bank | Flint, Quartz, Iron Ore | Agate, Fossil, Fossil Shell, River Pearl, Ancient Artifact |
| Desert | Sulfur, Gypsum, Desert Rose | Fossil Bone, Agate, Amber, Ancient Artifact |
| Swamp | Sulfur, Flint, Gypsum | Fossil, Fossil Bone, Amber, Ancient Coin |
| Forest | Flint, Iron Ore, Quartz | Ancient Seed, Fossil, Agate, Ancient Artifact |
| Mountain | Iron Ore, Copper Ore, Quartz | Silver Ore, Agate, Fossil, Ancient Artifact |
| Clay Pit | Basic clay and stone | (none) |
| Peat Bed | Peat, soil, clay | (none) |
For pure museum value, the four free digging environments (Beach, River Bank, Desert, Swamp, Forest, Mountain) are the ones that matter; the Clay Pit and Peat Bed exist mainly for building materials. Players who clear a full loop each day gather both construction loot and museum relics in one trip.
A full digging loop takes a modest slice of the day but pays double duty. Rotating through the six valuable spots rather than re-digging the nearest one maximizes both relic variety and the chance of hitting a legendary drop, since each spot shares its loot table with the museum. Players who fold this loop into their normal between-family-chores downtime cut the museum grind dramatically.
Rare Loot Unlock Levels
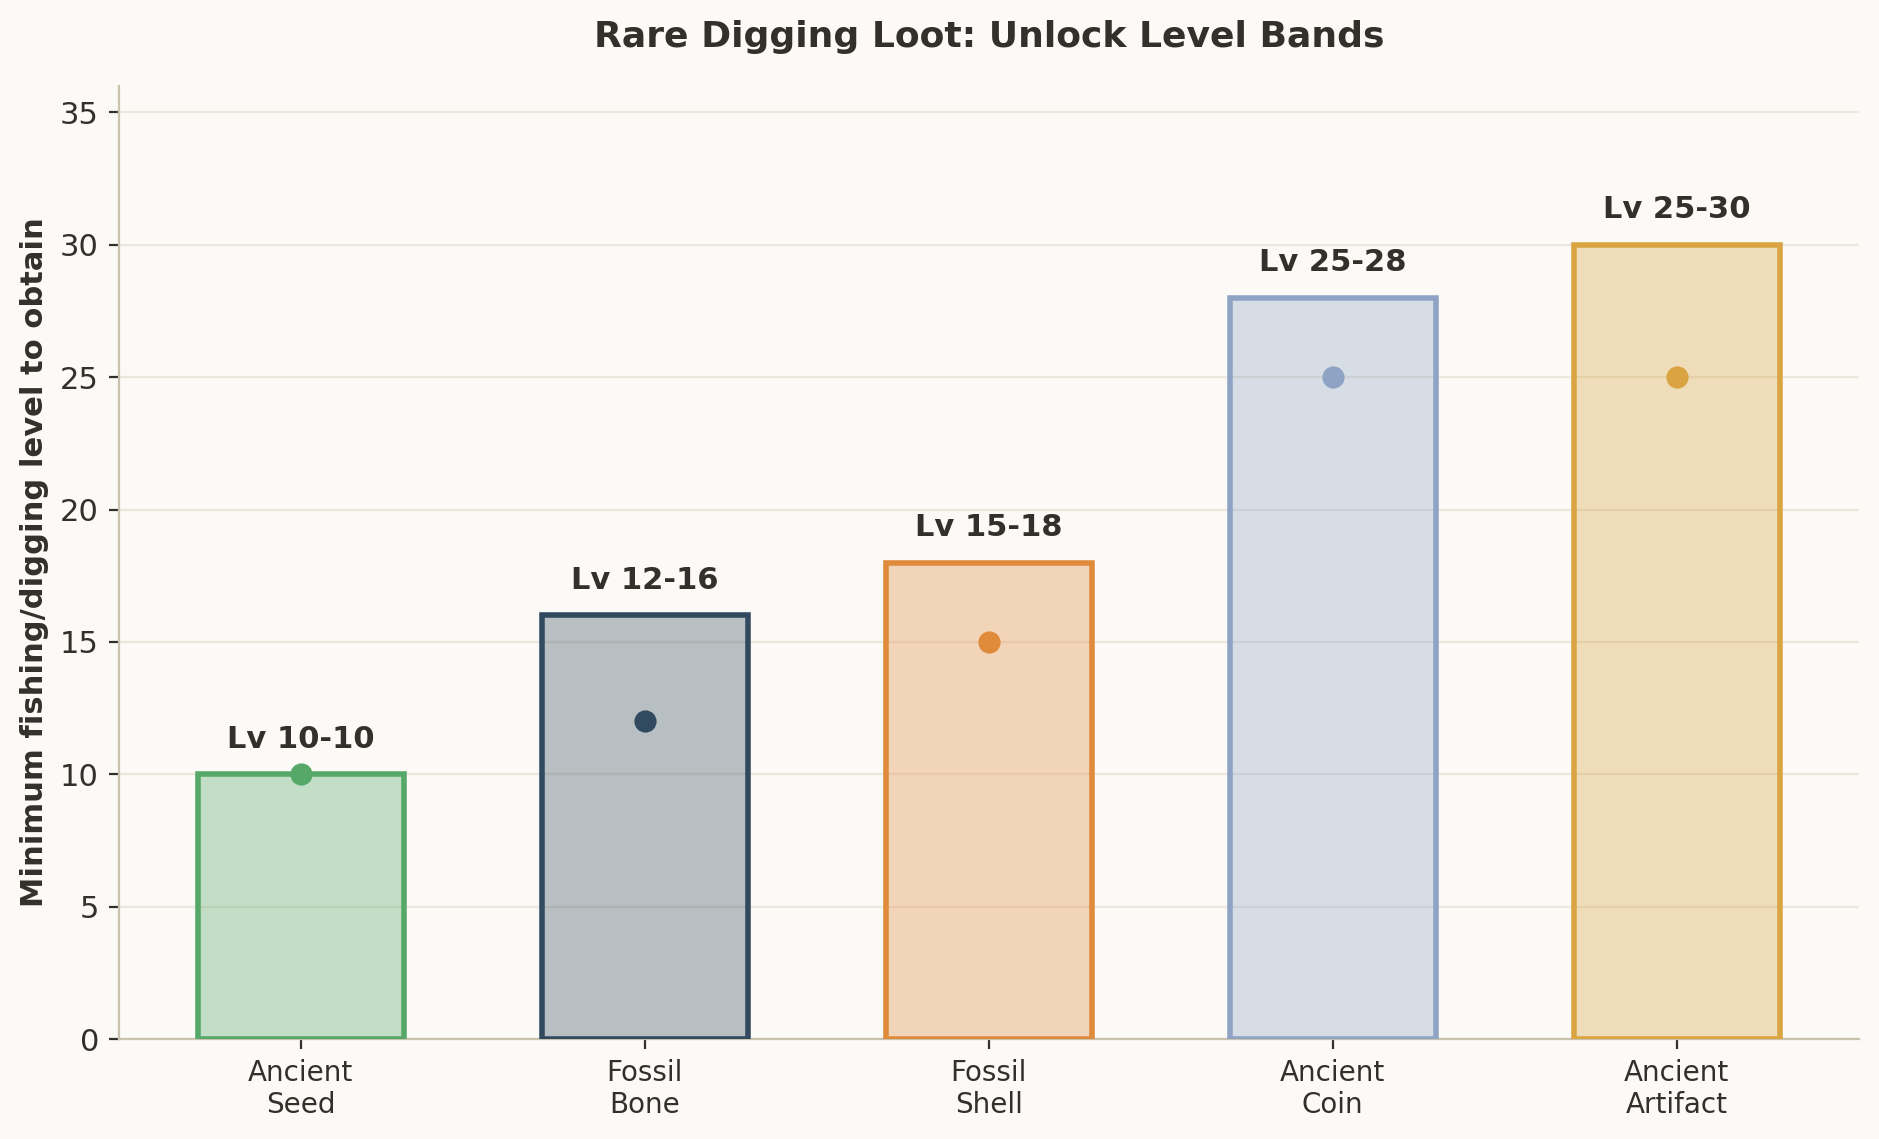
Not every rare drop appears from day one. Each piece of legendary or fossil loot has an unlock window tied to the player’s digging progress, so chasing the wrong item too early wastes time. The handy rule is that ancient treasure (Artifacts and Coins) is a late-game reward, while fossils and the Ancient Seed unlock much earlier.
- Ancient Seed: unlockable earliest of the set, around level 10.
- Fossil Bone / Fossil Shell: mid-progress fossils that surface in the early-to-mid digging range.
- Ancient Coin / Ancient Artifact: the deepest unlock band, so players should plan to hunt these only after they have built up their digging skill.
Pairing this timing with the skill-tree route lets a player focus on low-level fossils early and switch to ancient loot once the unlock window opens.
The unlock timing largely removes wasted effort. There is no point re-digging the Mountain loop for an Ancient Artifact before the skill threshold, because the drop will not appear no matter how many times the player digs. Instead, players should bank the early fossils and seeds while leveling digging, then revisit the deeper spots once late-game loot opens. This timing-first approach is the single biggest time saver in the whole museum.
Best Digging Strategy
The fastest museum build follows a simple order: clear the beach and river bank first for easy fossils, then add forest and mountain loops for gems and ores, and finally grind the deep bands once Ancient Artifacts and Coins unlock. Keeping one of everything instead of selling duplicates keeps every bundle topped up the moment the next slot opens.
Players tracking museum progress alongside gold-making should decide whether a given rare is worth keeping or selling; legendaries sell well, but a spare that completes a bundle usually pays more through the reward chain. When in doubt, the museum comes first for completionists.
A clean daily museum routine is: dig one full loop across the six valuable spots, mine the nearest mine floor for gems, fish one new location, and check which bundle is closest to closing. Because the museum rewards front-load quickly, this routine pays for itself within the first few weeks and seriously simplifies the second half of the game.
Museum FAQ
How many halls does the Sun Haven museum have?
The museum has three donation halls: the Hall of Gems, the Hall of Culture, and the Aquarium.
What is the easiest way to fill museum bundles?
Digging each day across the Beach, River Bank, Desert, Swamp, Forest, and Mountain spots, and keeping one of every mined gem and caught fish, fills most bundles naturally.
Can players get museum pieces from monster drops?
Yes. Several ancient relics and museum trinkets also drop from certain enemies, so monster-hunting overlaps with museum collection.
Do donated items disappear forever?
Donated items are used to fill bundle slots, and once a bundle completes the player receives its reward; donating is the intended collection loop, not a loss.
Should players save or sell rare digging loot?
Keep the first copy of every rare for a future bundle, then sell duplicates. A spare that completes a bundle usually pays more through the reward chain than a one-off sale.
Bundle structure and digging data in this guide reflect Sun Haven game data and community wiki values at the time of writing; players should check patch notes if any item changes.
Related Guides
- Sun Haven Mining Guide
- Sun Haven Fishing Guide
- Sun Haven Monster Drops & Loot Farming
- Sun Haven Skills Guide
- Sun Haven Money Guide
- Sun Haven Farming Guide
- Sun Haven Beginner Guide
Love cozy farming games?
Check out our complete Heartopia Guide — mobile cozy town simulation with home building, gardening, and cute neighbors!
🏡 Explore Heartopia →